
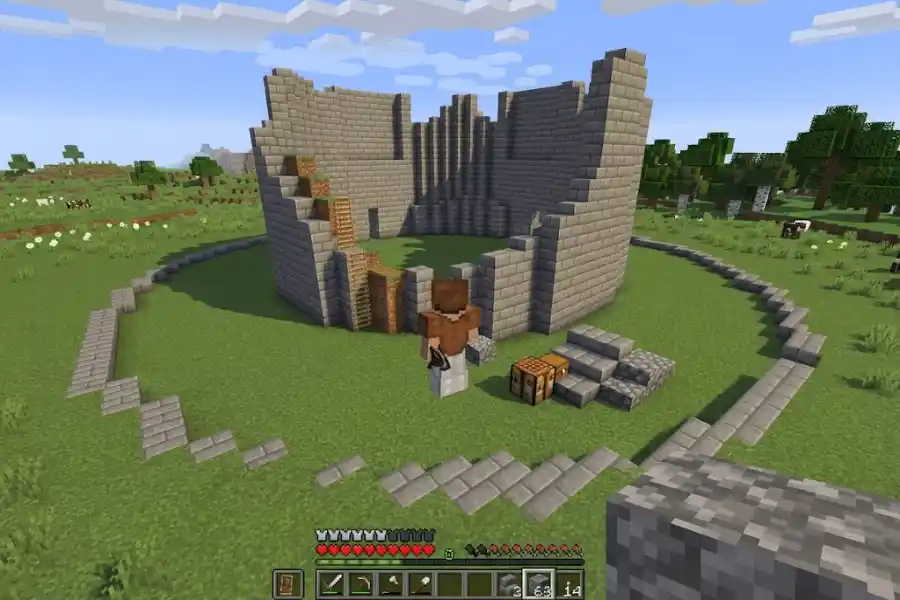
Minecraft Circle Calculator: How to Build Perfect Circles
Minecraft loves squares. Every block is a cube, and every wall is straight. So when you try to build a round tower, a pond, or a plaza, things get messy fast. Blocks that should curve end up looking like jagged stairs instead of a smooth circle. That’s where a Minecraft circle calculator comes in. Give it two numbers, and it hands you a block-by-block plan for a clean, round shape, no trial and error required.
This article walks through what these tools do, how the math behind them works, and how to use one to plan your next round build, plus a few tricks for players who want to try it by hand.
What Is a Minecraft Circle Calculator?
A Minecraft circle calculator is a small tool that turns a circle into a grid of blocks. You type in a size, and it lights up the exact squares you need to place to form a round shape. Most tools also count the blocks for you, so you know how many stacks of cobblestone, wool, or glass to bring before you start building.
Some tools call themselves a “circle generator” instead of a calculator. The names get used for the same thing. A few also handle ovals and full spheres, which helps if your build needs more than a flat ring on the ground.
Why Circles Are Hard to Build in Minecraft
Minecraft’s world is made of a grid. There is no such thing as half a block or a slightly bent edge. A true circle has a smooth, curved edge, and a grid cannot copy that curve exactly. It can only get close.
This is the same trick your phone screen uses. A photo of a circle on your screen is really thousands of tiny square pixels arranged to look round from a distance. Minecraft circles work the same way, just with bigger “pixels,” which are the blocks themselves.
The bigger the circle, the smoother it looks, because more blocks give the edge more chances to curve. A tiny four-block circle will always look blocky. A forty-block circle can look almost perfectly round.
How the Math Works: Radius and Diameter
Before you open any tool, it helps to know two words.
- Radius is the distance from the center of the circle to its edge.
- Diameter is the distance across the whole circle, through the center. It is always double the radius.
Most calculators ask for one or the other, so pick whichever number your build calls for. If you know you want a twenty-block-wide pond, that is your diameter. If you know how far the wall should sit from a center point, that is your radius.
There is one more detail that trips up a lot of builders: odd and even radius numbers behave differently.
- A circle with an even radius has its true center sitting on the corner where four blocks meet, not inside a single block.
- A circle with an odd radius has its true center inside one single block, which makes it easier to mark on the ground before you build.
If you want a clean center point for a fountain or a tree, pick an odd radius.
Quick Sizes to Know Before You Start
Here are some common circle sizes and roughly how many blocks their outline needs. Use these as a starting point, then let a calculator confirm the exact count for your build.
- Radius 5 (10 blocks wide): around 30 blocks for the outline
- Radius 10 (20 blocks wide): around 64 blocks for the outline
- Radius 15 (30 blocks wide): around 96 blocks for the outline
- Radius 20 (40 blocks wide): around 128 blocks for the outline
- Radius 25 (50 blocks wide): around 160 blocks for the outline
A filled circle, like a pond or a floor, needs far more blocks than just the outline, since you are covering the whole inside too. Most calculators show both counts, so check before you head out to gather materials.
How to Use a Minecraft Circle Calculator, Step by Step
- Pick your shape. Choose circle, oval, sphere, or dome, depending on what you are building.
- Enter your size. Type in your radius or diameter. Round numbers are easier to work with, but any number usually works.
- Choose outline or filled. Outline mode works for walls, rims, and towers. Filled mode works for floors, ponds, and platforms.
- Read the grid. Each highlighted square on the screen stands for one block in your world.
- Count your materials. Note the total block count, then check how many full stacks of sixty-four that adds up to.
- Build row by row. Follow the grid from one edge to the other, placing blocks to match each row. Working in straight lines is far easier than trying to eyeball a curve.
Building a Circle by Hand (No Tools Needed)
If you would rather build without any outside help, the “X method” is the easiest way to start.
- Place one block to mark the center of your circle.
- Run four straight lines out from that center, forming an X shape, with the same number of blocks on each arm.
- Connect the tips of the X with straight edges to form a rough square around the circle.
- Fill in the corners with short diagonal lines, stepping in one block at a time as you get closer to each edge.
This takes some practice, but it is a solid skill for survival worlds where using outside tools while playing does not fit your style.
From Circles to Spheres: Stacking Layers
A sphere is really just a stack of circles, each one a little smaller than the last as you move away from the middle. Start with your biggest circle at the equator, then shrink the radius by one or two blocks for each layer as you build up and down. A calculator that supports sphere mode will hand you every layer already worked out, which saves a lot of counting.
Circles on Multiplayer and Minigame Servers
Round arenas and spawn points show up often on multiplayer worlds, especially on minigame servers. If you play on one, it’s worth browsing minigame server codes for extra content while you plan your build.
Tips for Survival Mode Building
- Gather more material than you think you need. Running out halfway through a curve leaves an obvious gap.
- Mark your center block first, then measure outward so your circle stays even on all sides.
- Break large builds into sections if the area feels overwhelming, and finish one arc before starting the next.
- If you are building with friends on a shared server, agree on the block count ahead of time so nobody runs short.
- Once your build is finished, it’s worth taking time to record your build so you have a copy even if the world changes later.
- After that, it’s easy to share a quick clip with friends or on a build server.
Common Mistakes to Avoid
- Mixing up radius and diameter, which leads to a circle that is twice the size you meant to build.
- Ignoring the odd-versus-even radius rule, then wondering why the center looks off.
- Skipping the block count and running out of materials midway.
- Trying to eyeball a large circle without a grid or a plan, which almost always leaves flat spots.
Frequently Asked Questions
What is the best circle size for a Minecraft house or tower?
Most builders find that a radius between 8 and 15 blocks gives enough room for a tower or a small round house, while still looking round instead of like a rough octagon.
Can I build a circle in Minecraft Bedrock without mods?
Yes. The X method and any browser-based circle calculator work the same way on Bedrock as they do on Java, since neither one needs a mod to work.
How many blocks do I need for a radius 20 circle?
An outline needs roughly 128 blocks, while a fully filled circle of the same size needs well over a thousand. Always check the exact count in your calculator before gathering materials.
Does a Minecraft circle calculator work for spheres and domes too?
Many do. Look for a tool that lists sphere or dome as a shape option, since it will break the build down layer by layer instead of leaving you to work it out on your own.
Will a laggy game make it harder to place blocks accurately?
It can. If your game stutters while you are lining up a curve, it’s worth taking a moment to fix common game issues before you keep building, since a smoother frame rate makes it much easier to click the exact block you are aiming for.
Final Thoughts
A round tower, a pond, or a plaza can turn a plain base into something players remember. A Minecraft circle calculator takes the guesswork out of getting there, handing you a clean block map and an exact material count before you place a single block. Whether you use a tool or build by hand with the X method, the same rule applies: pick your radius, mark your center, and work one row at a time.