How to Clean Keyboard Keys Without Damaging Them
Look down at your keyboard right now. Go on, we will wait. If you just cringed a little, you are not alone. Most keyboards hide crumbs, dust, and germs. Most people never even think about it. The good news? You can fix this in less than an hour. You do not need any fancy tools to do it.
This article will show you how to clean keyboard keys the right way. It works for laptops, desktop keyboards, and mechanical ones too, even the ones covered in coffee stains. We will cover quick fixes, thorough cleaning steps, and the mistakes that can ruin your keys for good. By the end, you will know how to clean keyboard keys without breaking anything.
Why Your Keyboard Is Dirtier Than You Think
Studies have found that the average keyboard has more germs than a toilet seat.
Why? We touch our keyboards all day long. We do this right after eating a snack, or touching our phone, or shaking someone’s hand.
I have taken apart dozens of keyboards over the years. The mess under the keys is almost always worse than people expect. Crumbs, hair, skin cells, and a sticky film build up under every key. None of this hurts your typing right away. But over time, it can make keys stick. Keys can feel mushy. They can even stop working.
Cleaning your keyboard keys does more than make it look nice. It keeps you healthy. It also helps your keyboard last much longer. Learning how to clean keyboard keys the right way now saves you from bigger repairs later.
What You Need Before You Start
You probably own most of these items already. Get them ready before you start. That way, you will not stop halfway through the job to go find something.
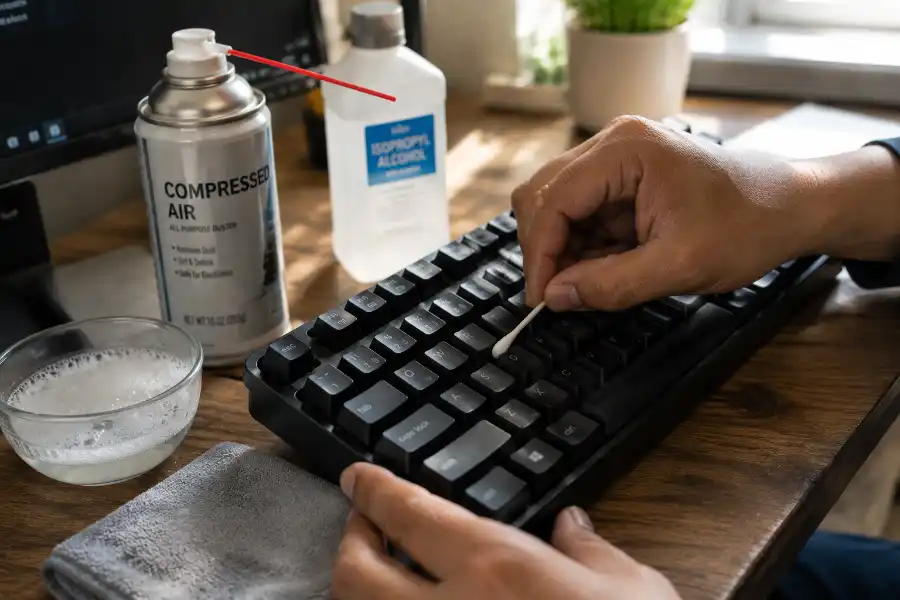
- A can of compressed air
- Isopropyl alcohol (70 percent or higher)
- Cotton swabs
- A soft brush, like a clean makeup brush or toothbrush
- A microfiber cloth
- A small bowl of warm water with a few drops of mild dish soap
- A keycap puller (a flathead screwdriver works too, in a pinch)
You do not need every item on this list for a quick clean. But a full, thorough clean goes faster when you have it all ready to go.
The 5-Minute Quick Clean
Use this method once a week to keep your keyboard keys clean. It stops dirt from building up in the first place.
- Turn off your keyboard, or unplug it from your computer.
- Flip it upside down. Gently shake it over a trash can or sink. You will be shocked at what falls out.
- Hold a can of compressed air at a slight angle. Spray short bursts between the keys.
- Dip a cotton swab in isopropyl alcohol. Wipe along the edges of each key to lift oil and grime.
- Wipe the whole surface with a dry microfiber cloth to finish.
That is it. This quick routine takes less time than making a cup of coffee. It stops small dirt from turning into a big problem.
The Thorough Clean: How to Clean Keyboard Keys One by One
Are your keys sticky? Do they look yellow? Has it been months since your last clean? Then it is time for a thorough clean. This method takes about 30 to 45 minutes, plus time to dry.
- Take a photo of your keyboard layout first. This step seems small, but it makes putting the keys back much easier later.
- Use a keycap puller to gently lift each key straight up. Do not pull at an angle. This can snap the small plastic clips underneath.
- Place all the keycaps into a bowl of warm, soapy water. Let them soak for about 20 minutes.
- While the keycaps soak, clean the exposed keyboard base. Use compressed air first. Then use a cotton swab dipped in alcohol to clean around each switch.
- Drain the soapy water. Rinse the keycaps under clean water. Gently scrub any stubborn spots with a soft toothbrush.
- Lay the keycaps on a towel. Let them air dry all the way. This takes about two to three hours. Do not skip this step. Wet keycaps can cause damage if you put them back too soon.
- Once everything is fully dry, snap the keycaps back into place. Match each key to the spot you photographed earlier.
Your keyboard should now look and feel close to new.
How to Clean Sticky or Stained Keys
Sticky keys are usually caused by a spilled drink, especially soda or juice. The sugar in these drinks dries into a sticky film. That film attracts even more dust.
For a sticky key, pop off the keycap. Soak it in warm, soapy water for at least 30 minutes. This is longer than the usual quick rinse. Sugar needs extra time to fully dissolve. Once the key feels smooth, not sticky, rinse it well. Let it dry all the way before you snap it back on.
For stained or yellow keys, try a paste of water and baking soda. Gently rub the paste onto the key with a soft cloth. Let it sit for a minute. Then rinse and dry. This will not fix heavy yellowing from sunlight. But it does lift stains from coffee, grease, and hand oils.
Did liquid get inside the keyboard? If some keys on your keyboard stop working afterward, turn it off right away. Let it dry upside down for at least 48 hours before you test it again. Do not rush this step. It is one of the top reasons keyboards break for good.
Cleaning Different Types of Keyboards
Not every keyboard is built the same way. The safest way to clean keyboard keys changes based on what you own.
Laptop Keyboards
Laptop keys are shorter and more fragile than desktop keys. They also sit closer to sensitive parts inside. Skip the soaking step. Instead, tilt your laptop at an angle. Use short bursts of compressed air. Clean the surface with a barely damp microfiber cloth. Never let liquid pool near the keys. If a MacBook key still feels unresponsive once everything is fully dry, a Mac SMC reset is worth trying before you assume the worst. Once it is working properly again, it is also worth learning a few Mac keyboard shortcuts so you get the most out of a clean board.
Mechanical Keyboards
Mechanical keyboards are the easiest to clean thoroughly. The keycaps pop off easily. The switches underneath handle dust well. This makes them the best fit for the full soak-and-scrub method above. Most mechanical keyboards end up on Windows desktop setups, so while yours is apart, it is a good moment to skim a few Windows 11 tips and tricks for the rest of your setup too.
Wireless and Membrane Keyboards
These keyboards often have keycaps that are hard to remove safely. The rubber layer underneath does not like heavy moisture. Stick to compressed air and alcohol-dipped cotton swabs. Skip the full soak.
Mistakes That Can Ruin Your Keyboard
A few common habits do more harm than good. Avoid these while you clean:
- Spraying cleaner right onto the keyboard, instead of onto a cloth first
- Using bleach or harsh chemicals, which can fade or strip the letters off your keys
- Putting keycaps back on while they are still even a little damp
- Using a vacuum with strong suction right on the keys, which can pull off small keycaps
- Ignoring small spills because they seem minor at the time
Take an extra five minutes to do it with care. It will save you from buying a new keyboard later.
How Often Should You Clean Your Keyboard?
For most people, a quick clean once a week is enough. Add a thorough clean every one to two months. Do you eat at your desk a lot? Do you share your keyboard with other people? Do you work in a dusty spot? If so, clean it more often.
Frequently Asked Questions
Can I use disinfecting wipes on my keyboard?
Yes, but pick your wipes with care. Make sure they are not soaking wet. Skip wipes with bleach, since bleach can fade the letters on your keys.
Is it safe to wash keycaps in the dishwasher?
No, this is not a good idea. The heat from a dishwasher’s dry cycle can warp plastic keycaps. The strong water pressure can also push moisture where it should not go.
Can I use a hairdryer to speed up drying time?
You can, but only on the coolest, lowest setting. Hold it far from the keys. Heat can warp plastic keycaps, so patience is the safer choice.
What should I do if I spill coffee or soda on my keyboard?
Turn the keyboard off right away. Flip it upside down so the liquid drains out instead of sinking in. Let it air dry for at least 48 hours. Do not test it early, even if it looks dry on the surface.
Do I need to remove every single key to clean my keyboard well?
No. A weekly quick clean with compressed air and a cotton swab is enough most of the time. This is often all you need to keep keyboard keys clean between thorough cleans. Save the full keycap removal for a thorough clean every couple of months.
A clean keyboard is a small thing. But it makes a real difference in how nice your computer feels to use every day. Set a reminder. Grab your supplies. Give your keys the care they have been waiting for.